
Creating the first campaign
How to create your first campaign:
When you have created your team, set it live and have some team members on your team. It’s time to create the first campaign.
The following steps will guide you through your first campaign setup.
1. Click on campaigns and click on “New campaign”
2. Enter details:
Now it’s time to help your team members understand what your campaign is about.
First you have to fill out your campaign name. This would advantageously be what the campaigns is about, such as “summer campaign”, “Sale on xxx product”, “20% on our xxx product”, “Let’s get on TikTok”, “Spread the word about our new xxx product” and so on.
Then you need a campaign hashtag, so we can track the content that the influencers use.
If your company already have some predefined hashtags you can use it here, otherwise you can match the hashtag your campaign such as: “Dreaminfluence”, “Dreamsale”, “Dream20percent”, “Dreaminfluenceontiktok”, “Dreaminfluencexproduct” and so on.
When the influencers post, they will use your team hashtag + the campaign hashtag.
You can’t have the same hashtag twice. So you have to use a new hashtag on each campaign.
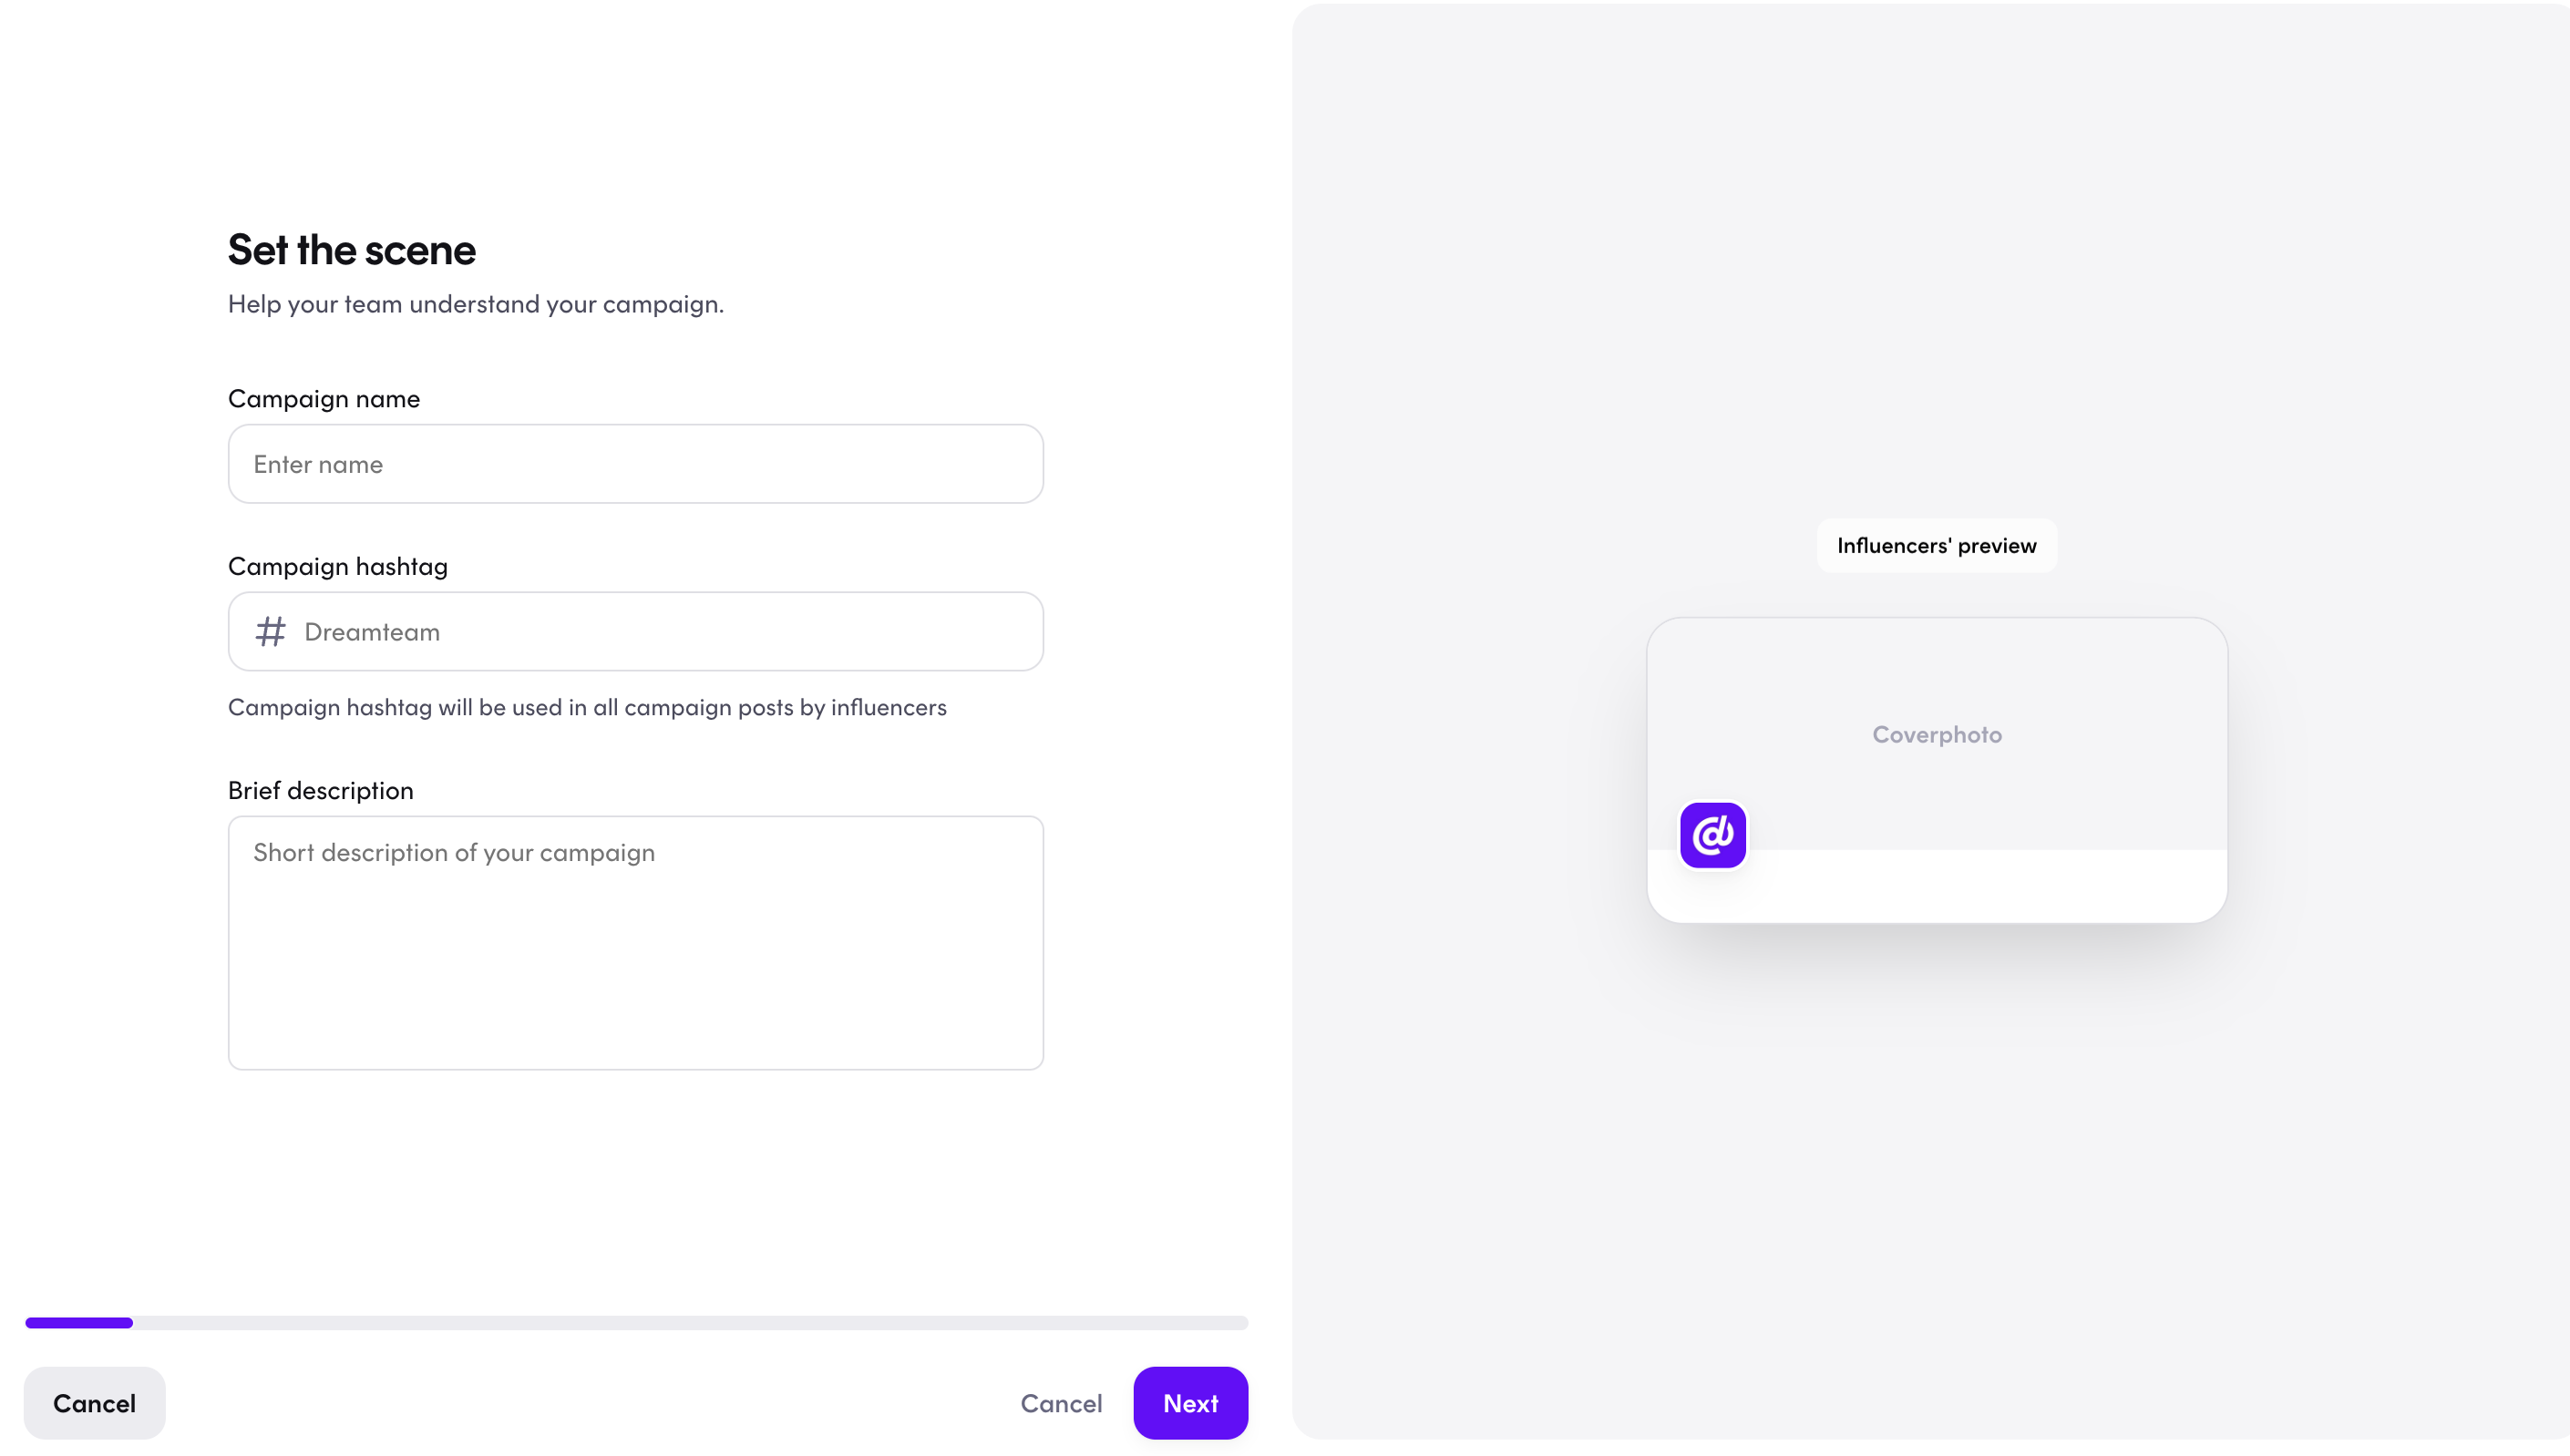
Next up is your campaign description.
Here you have to make a short brief description of what the campaign is about.
Let the influencers know what they can expect from this campaign and be clear about what you expect from them. Let's imagine that Dreaminfluence is a fashion brand and that we'd like our influencers to create some hype about a specific collection. A concrete example could look something like this:
Objective of the campaign:
The goal of this campaign is to highlight Dreaminfluence's signature styles, which we are known for. Our signature jackets, shorts, and vests are key pieces that continue to define our brand 💖
Campaign details:
You are invited to choose your favorite style that you would like to feature as a statement piece in your wardrobe. The focus of this campaign is to showcase these items in a way that emphasizes their unique design and high quality.
Participation guidelines:
🛍️ Choose your style: Select your favorite piece from our catalog, which you will receive a link to once you join the campaign.
📸 Capture the essence: Take an authentic photo where the item is the main focus. Be creative and consider how best to highlight the texture, pattern, and overall look of the piece so it fits naturally into your online universe.
💌 Share your style: Post 1 carousel + story on your social media channels using the campaignhashtag and tag @dreaminfluence.app.
Key focus:
The image must clearly highlight the style.
Showcase the versatility of the piece in your everyday wardrobe.
If you have any questions or need further information, feel free to reach out. We look forward to seeing how you style our pieces and can’t wait to see the creative ways you make them your own!
Things that you might want to consider and include in this part:
- If you have the campaign live on both Instagram and Tiktok - would you like the influencers to join both campaigns? If not, you should include something like this at the bottom of the text: "choose either Tiktok or Instagram - if you join both campaigns anyway we'll remove you from one of them"
- If your campaign is time-sensitive (if it's a happening at a specific time or date, if the deadline is super specific, if it's an experience etc.), please include this part in the text with an exclamation point (‼️) to highlight the importance of the date and/or time
- If you need raw material (without text, music etc.) please include this as a demand
- If you need pre-approval, include this as a FYI: "On this campaign you'll have to get your content approved before posting"
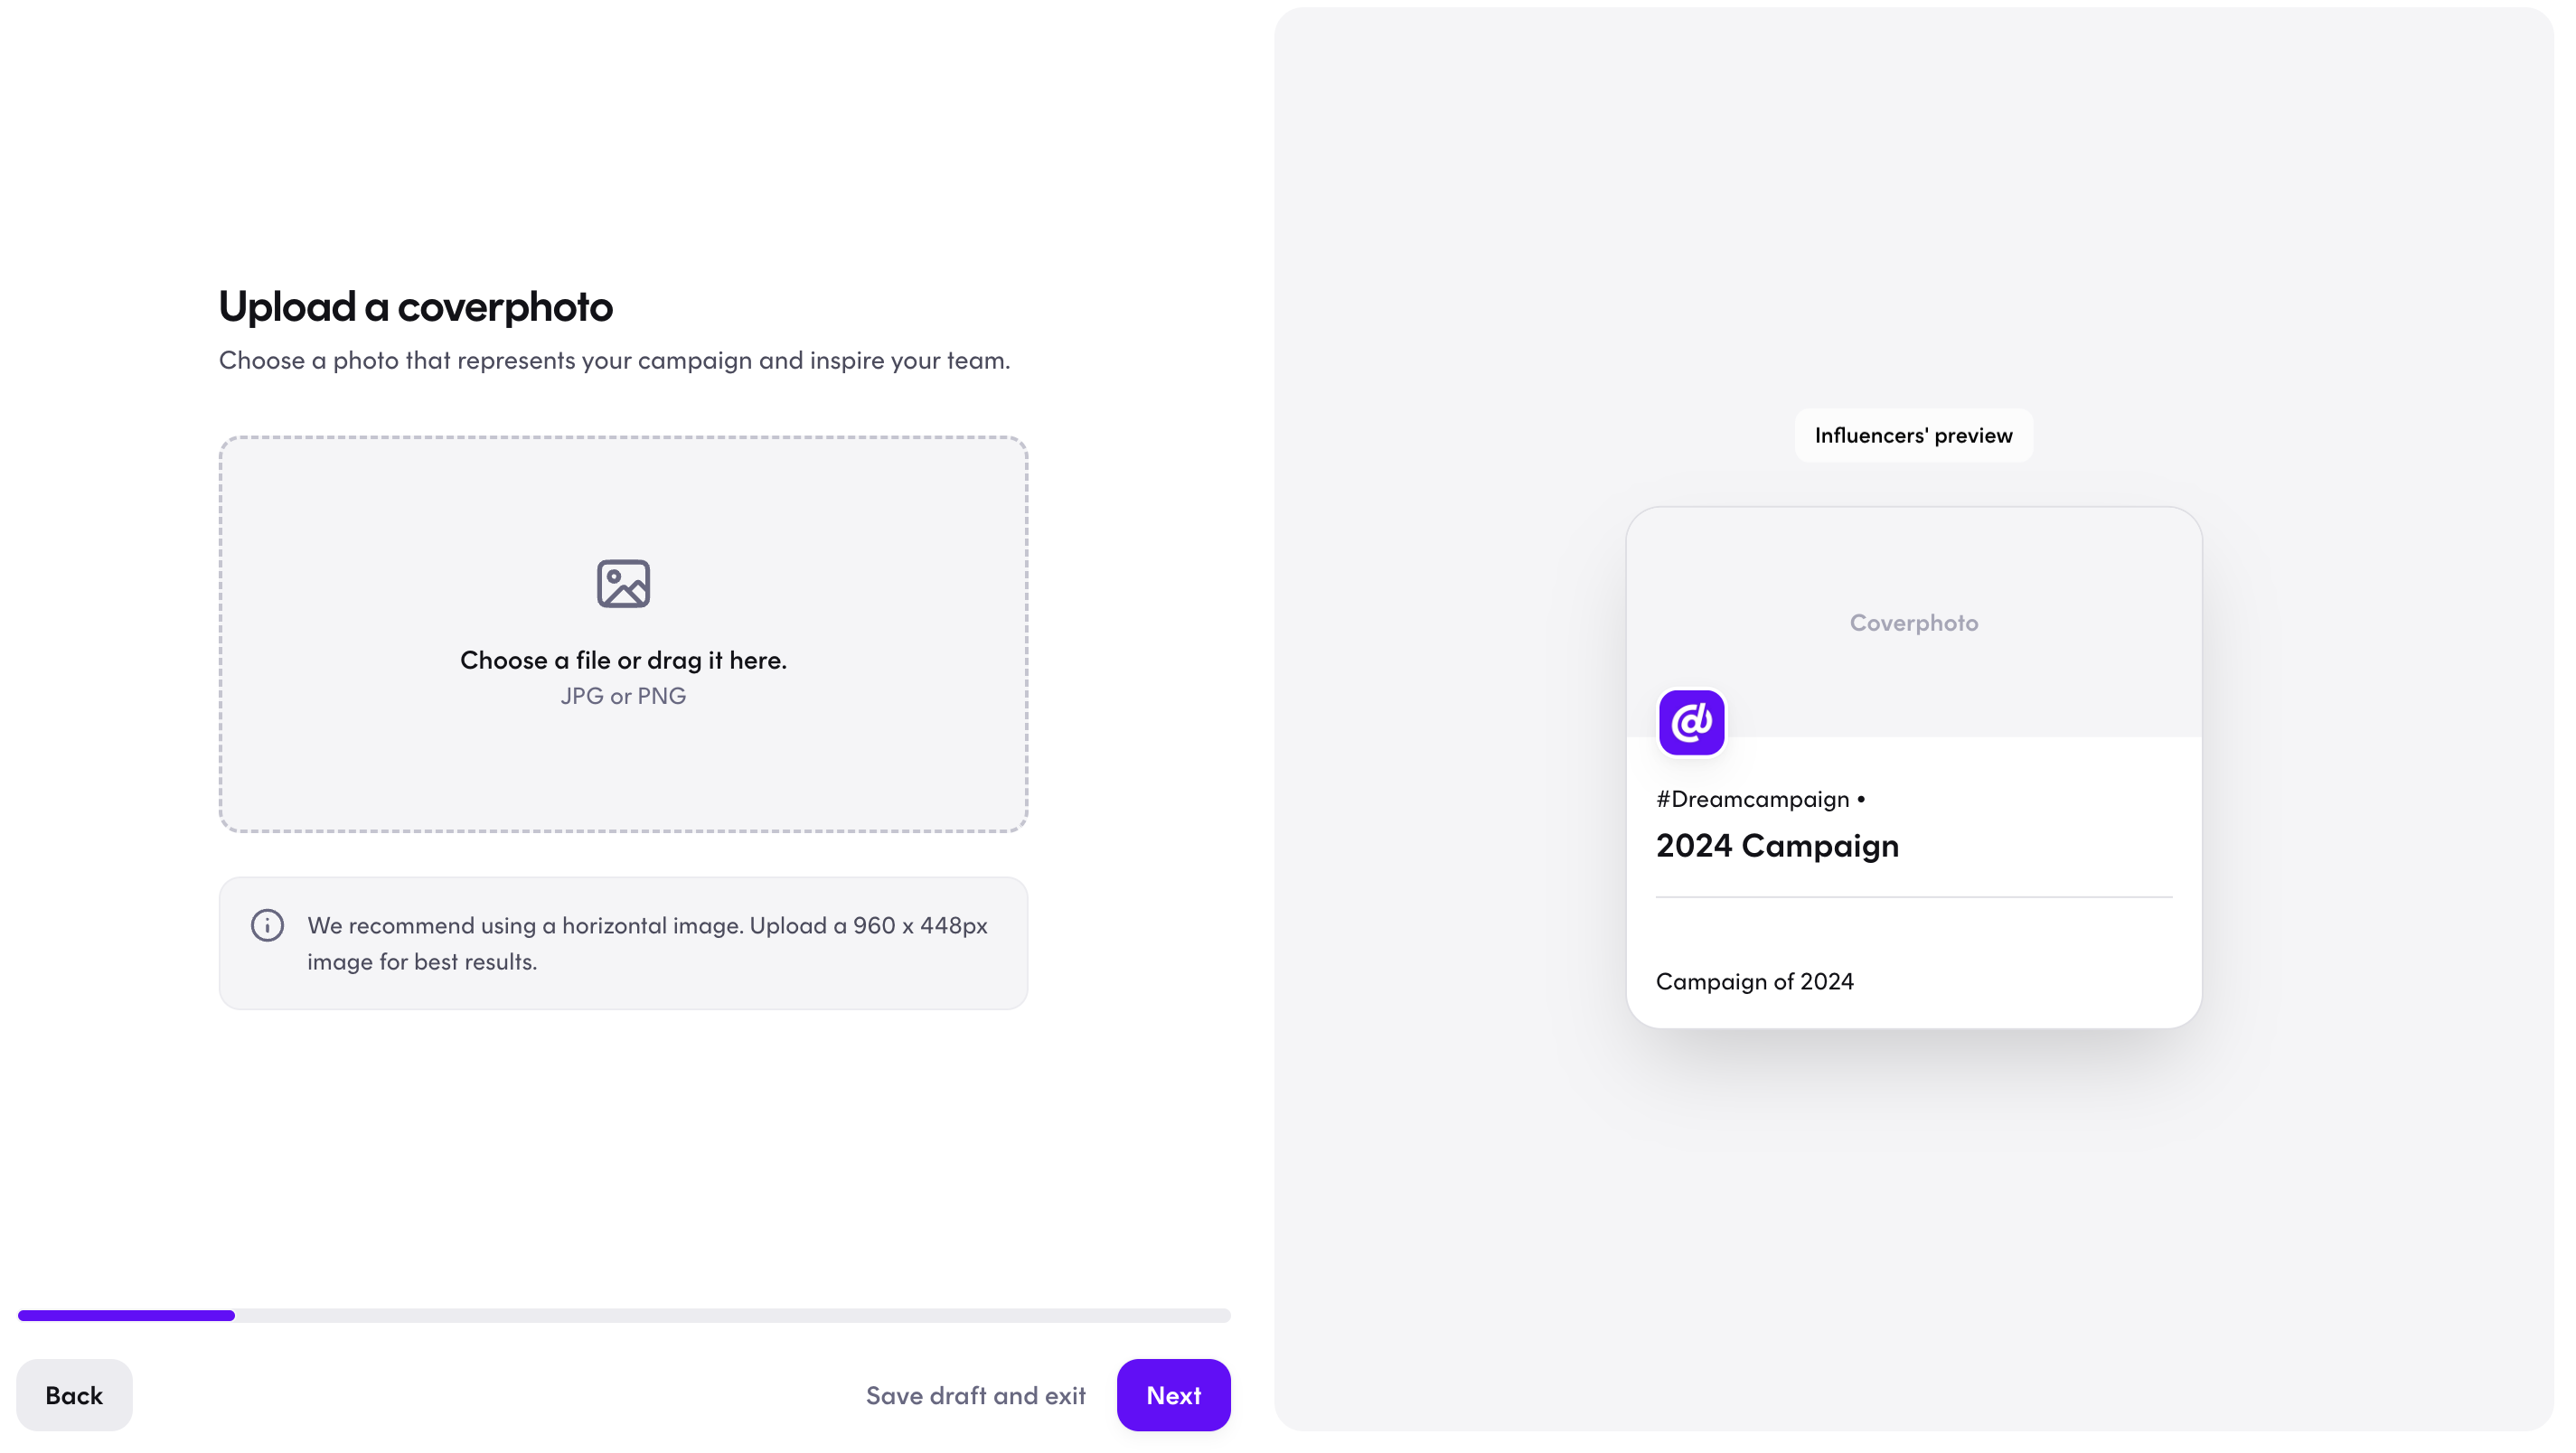
3. Upload your cover photo:
Here you shall choose a photo that represents your campaign and inspires your team.
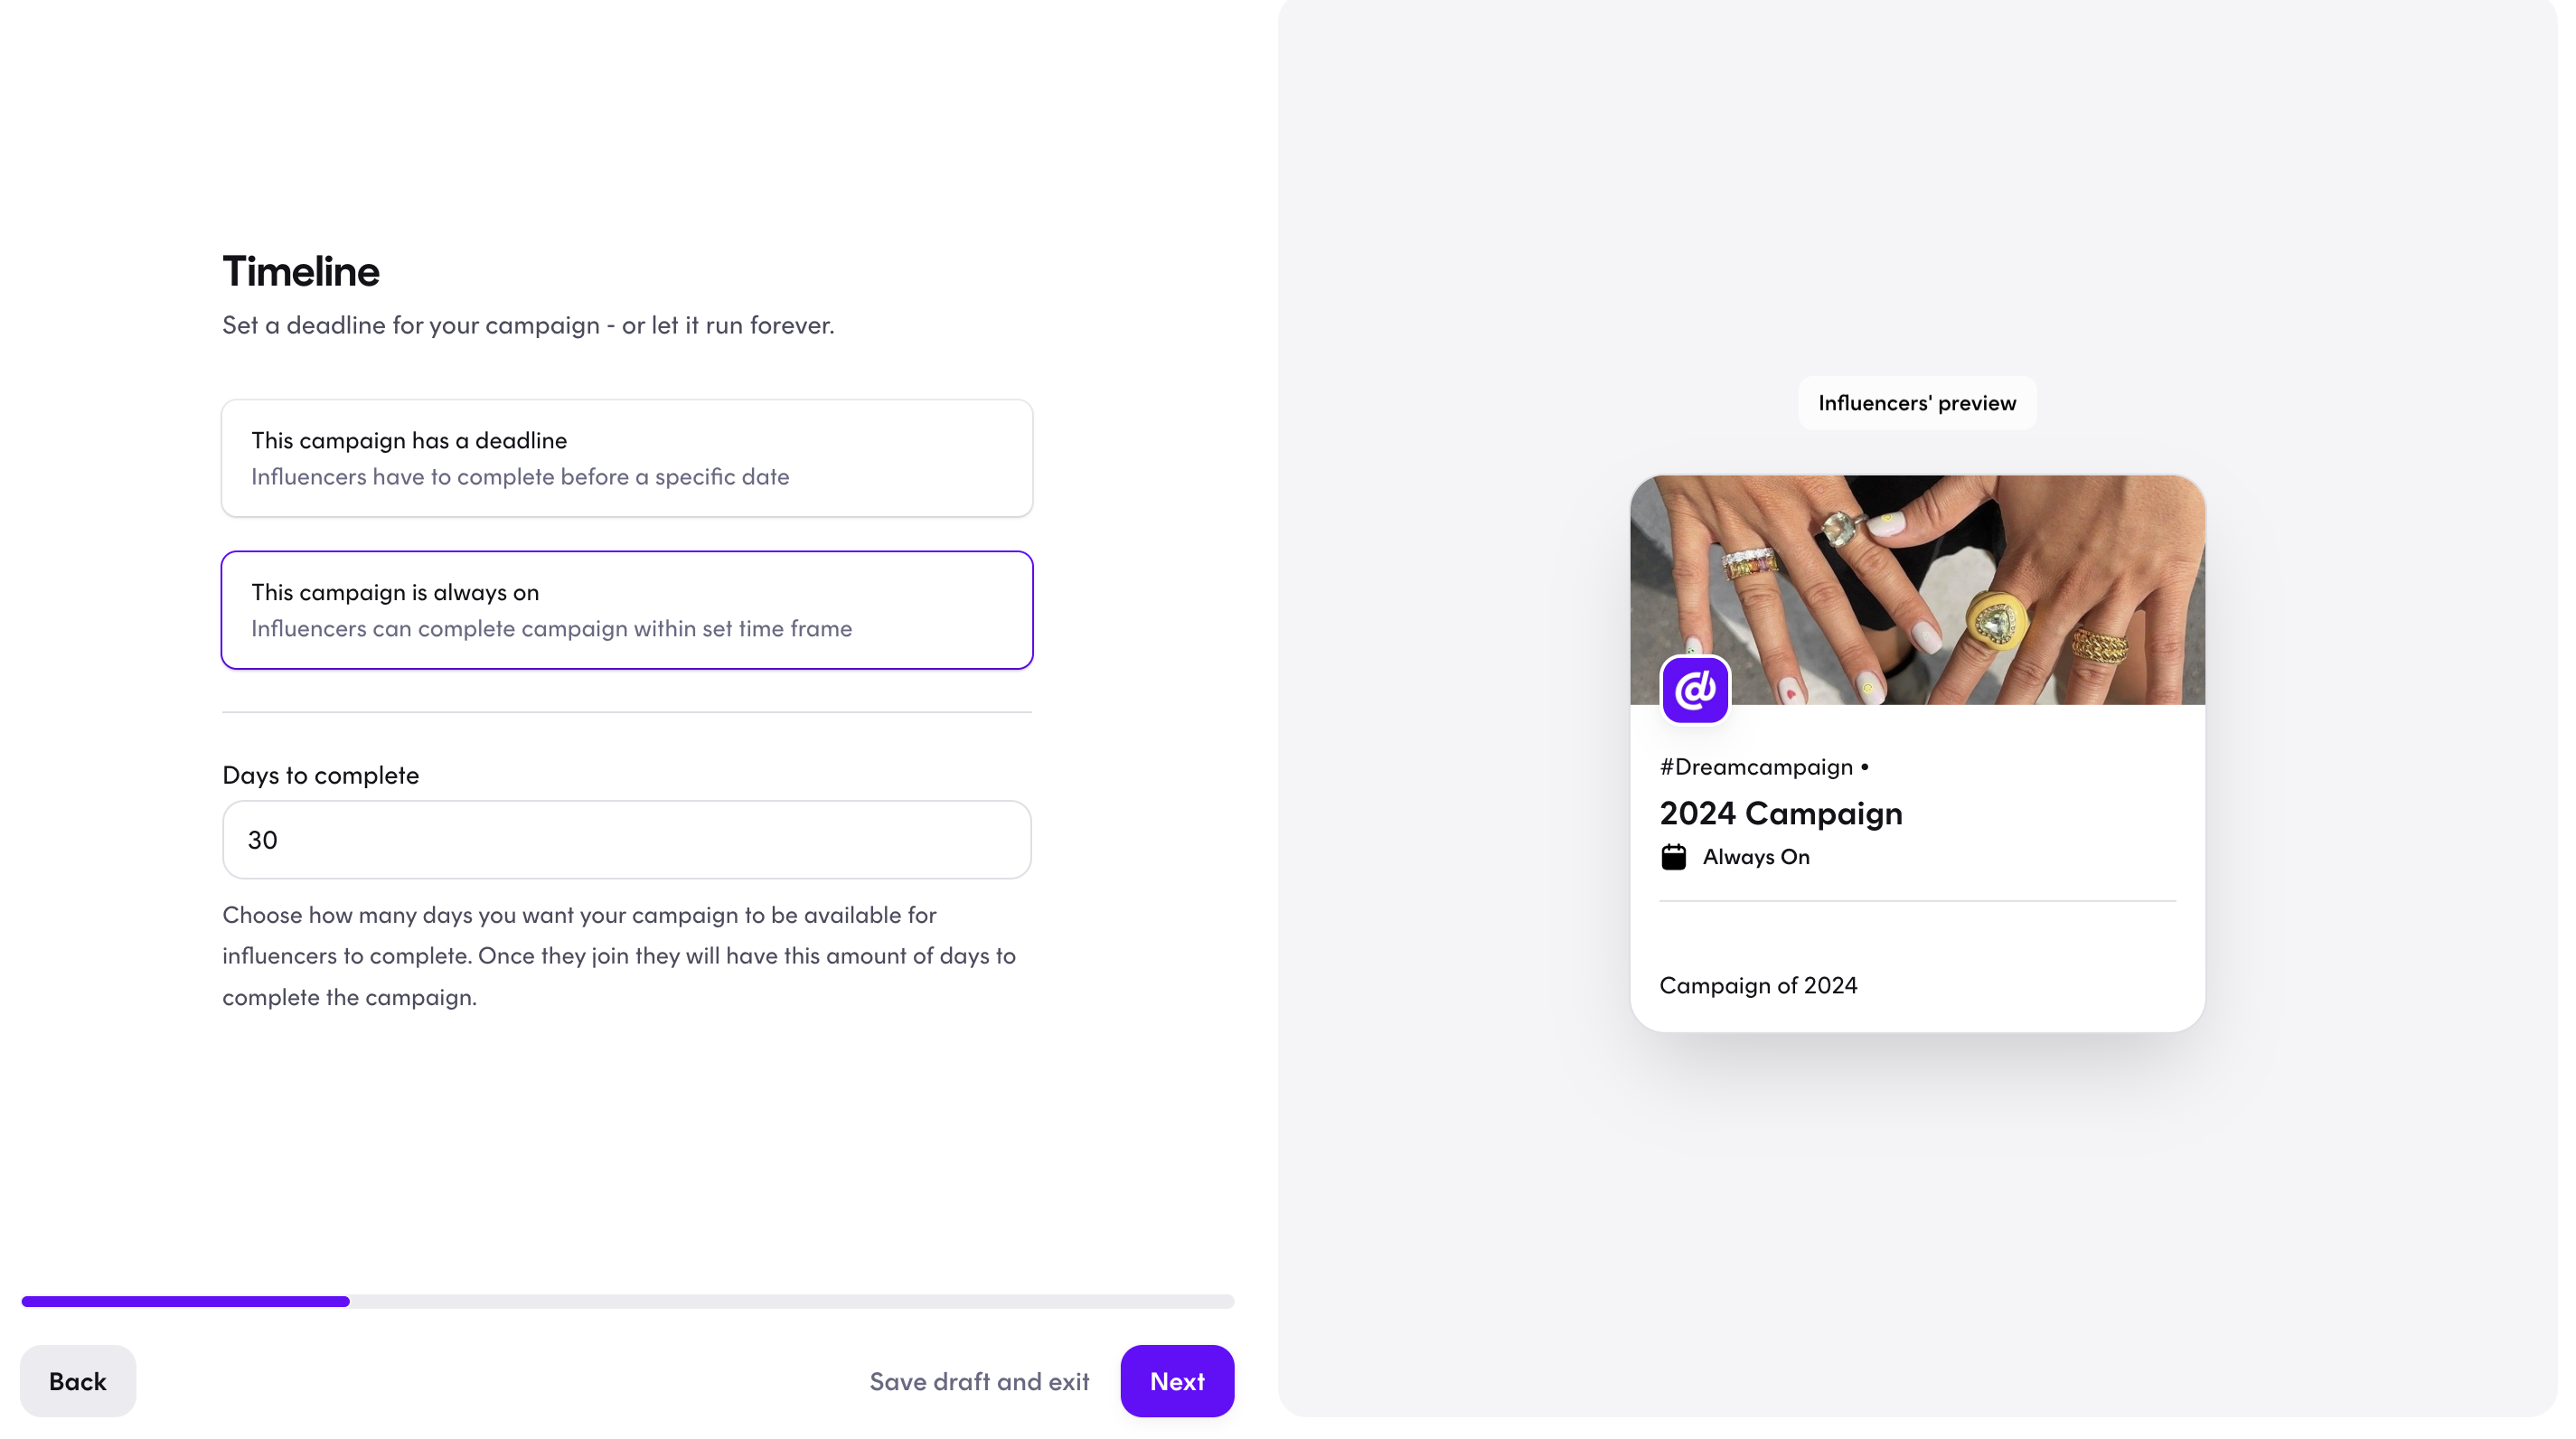
4. Campaign type:
You can choose between two types of campaigns.
Campaign deadline:
On this campaign you choose a starting and an ending point.
The campaign will be open for influencers to apply until the start date. Then the influencers have until the deadline to finish the assignment for the campaign.
We often say that it is a good idea to have 3-4 weeks. Because they have to receive the products, take pictures and post them.
Always on campaign:
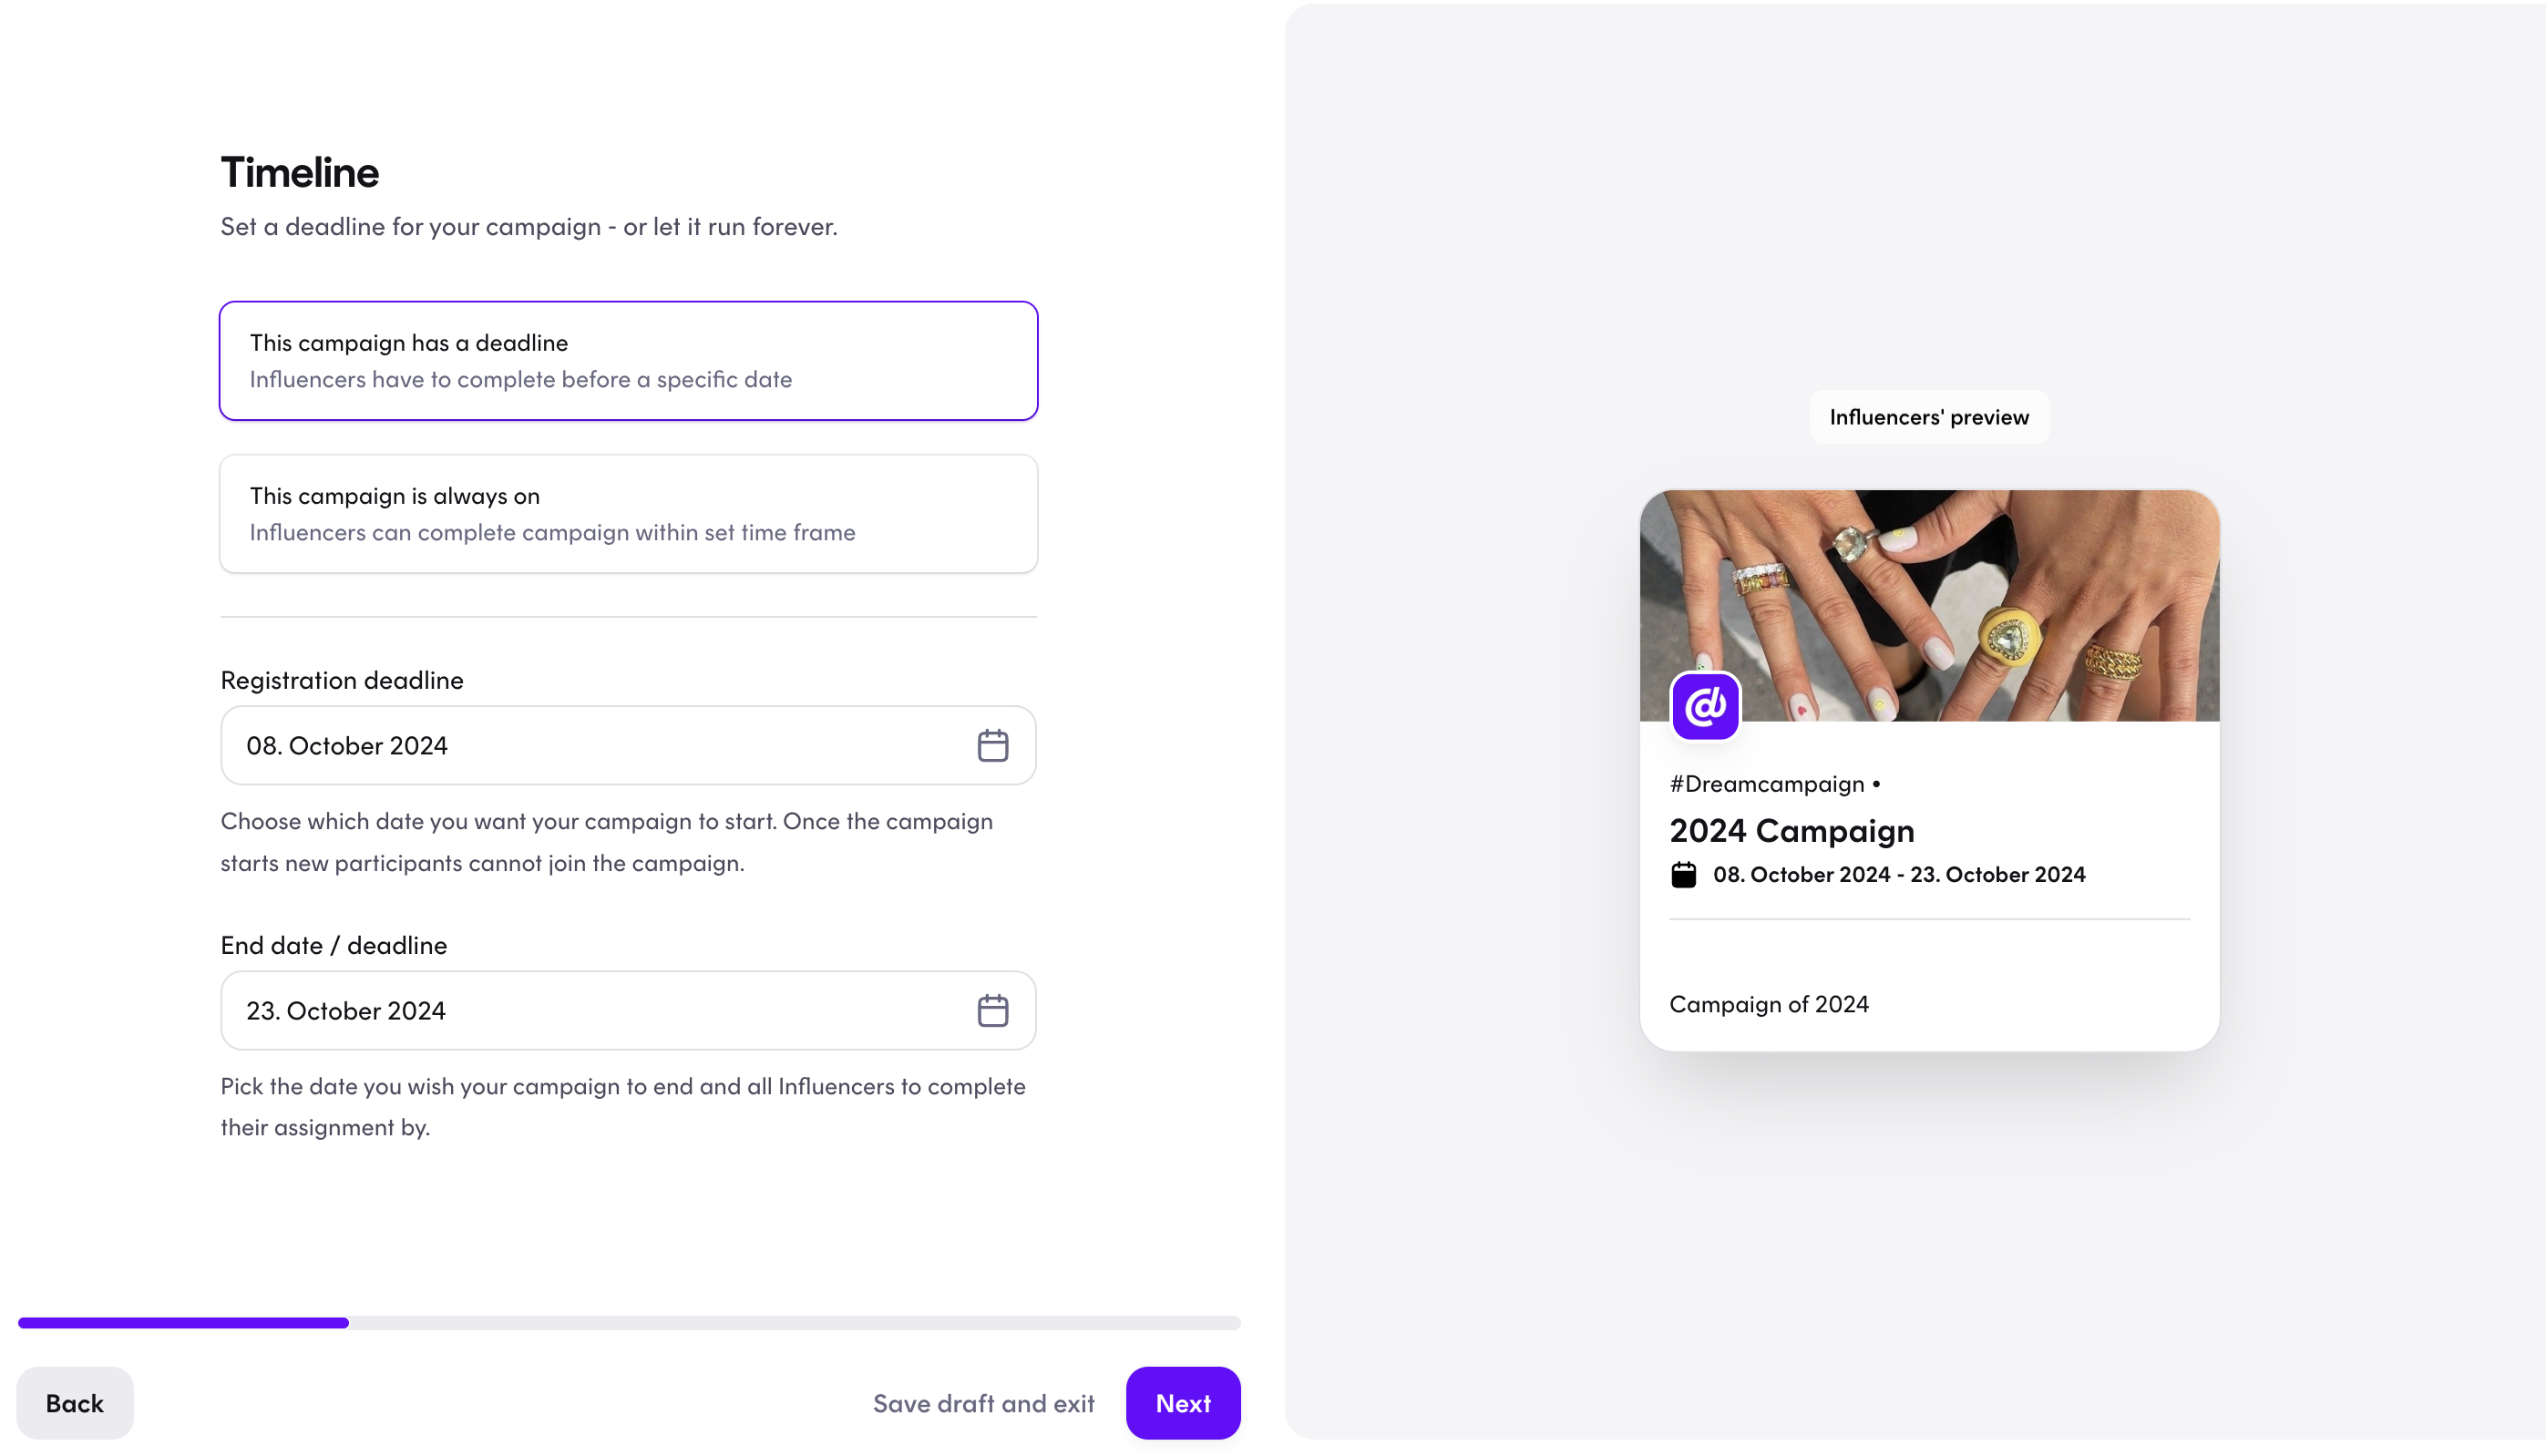
Is an ongoing campaign. You choose how many days the influencer has to complete the campaign. So when the influencers jump on the campaign, they have from that day ex. 30 days to complete the task.
As above, 30 days is a good amount of time for the influencer to receive the products, take pictures and post them.
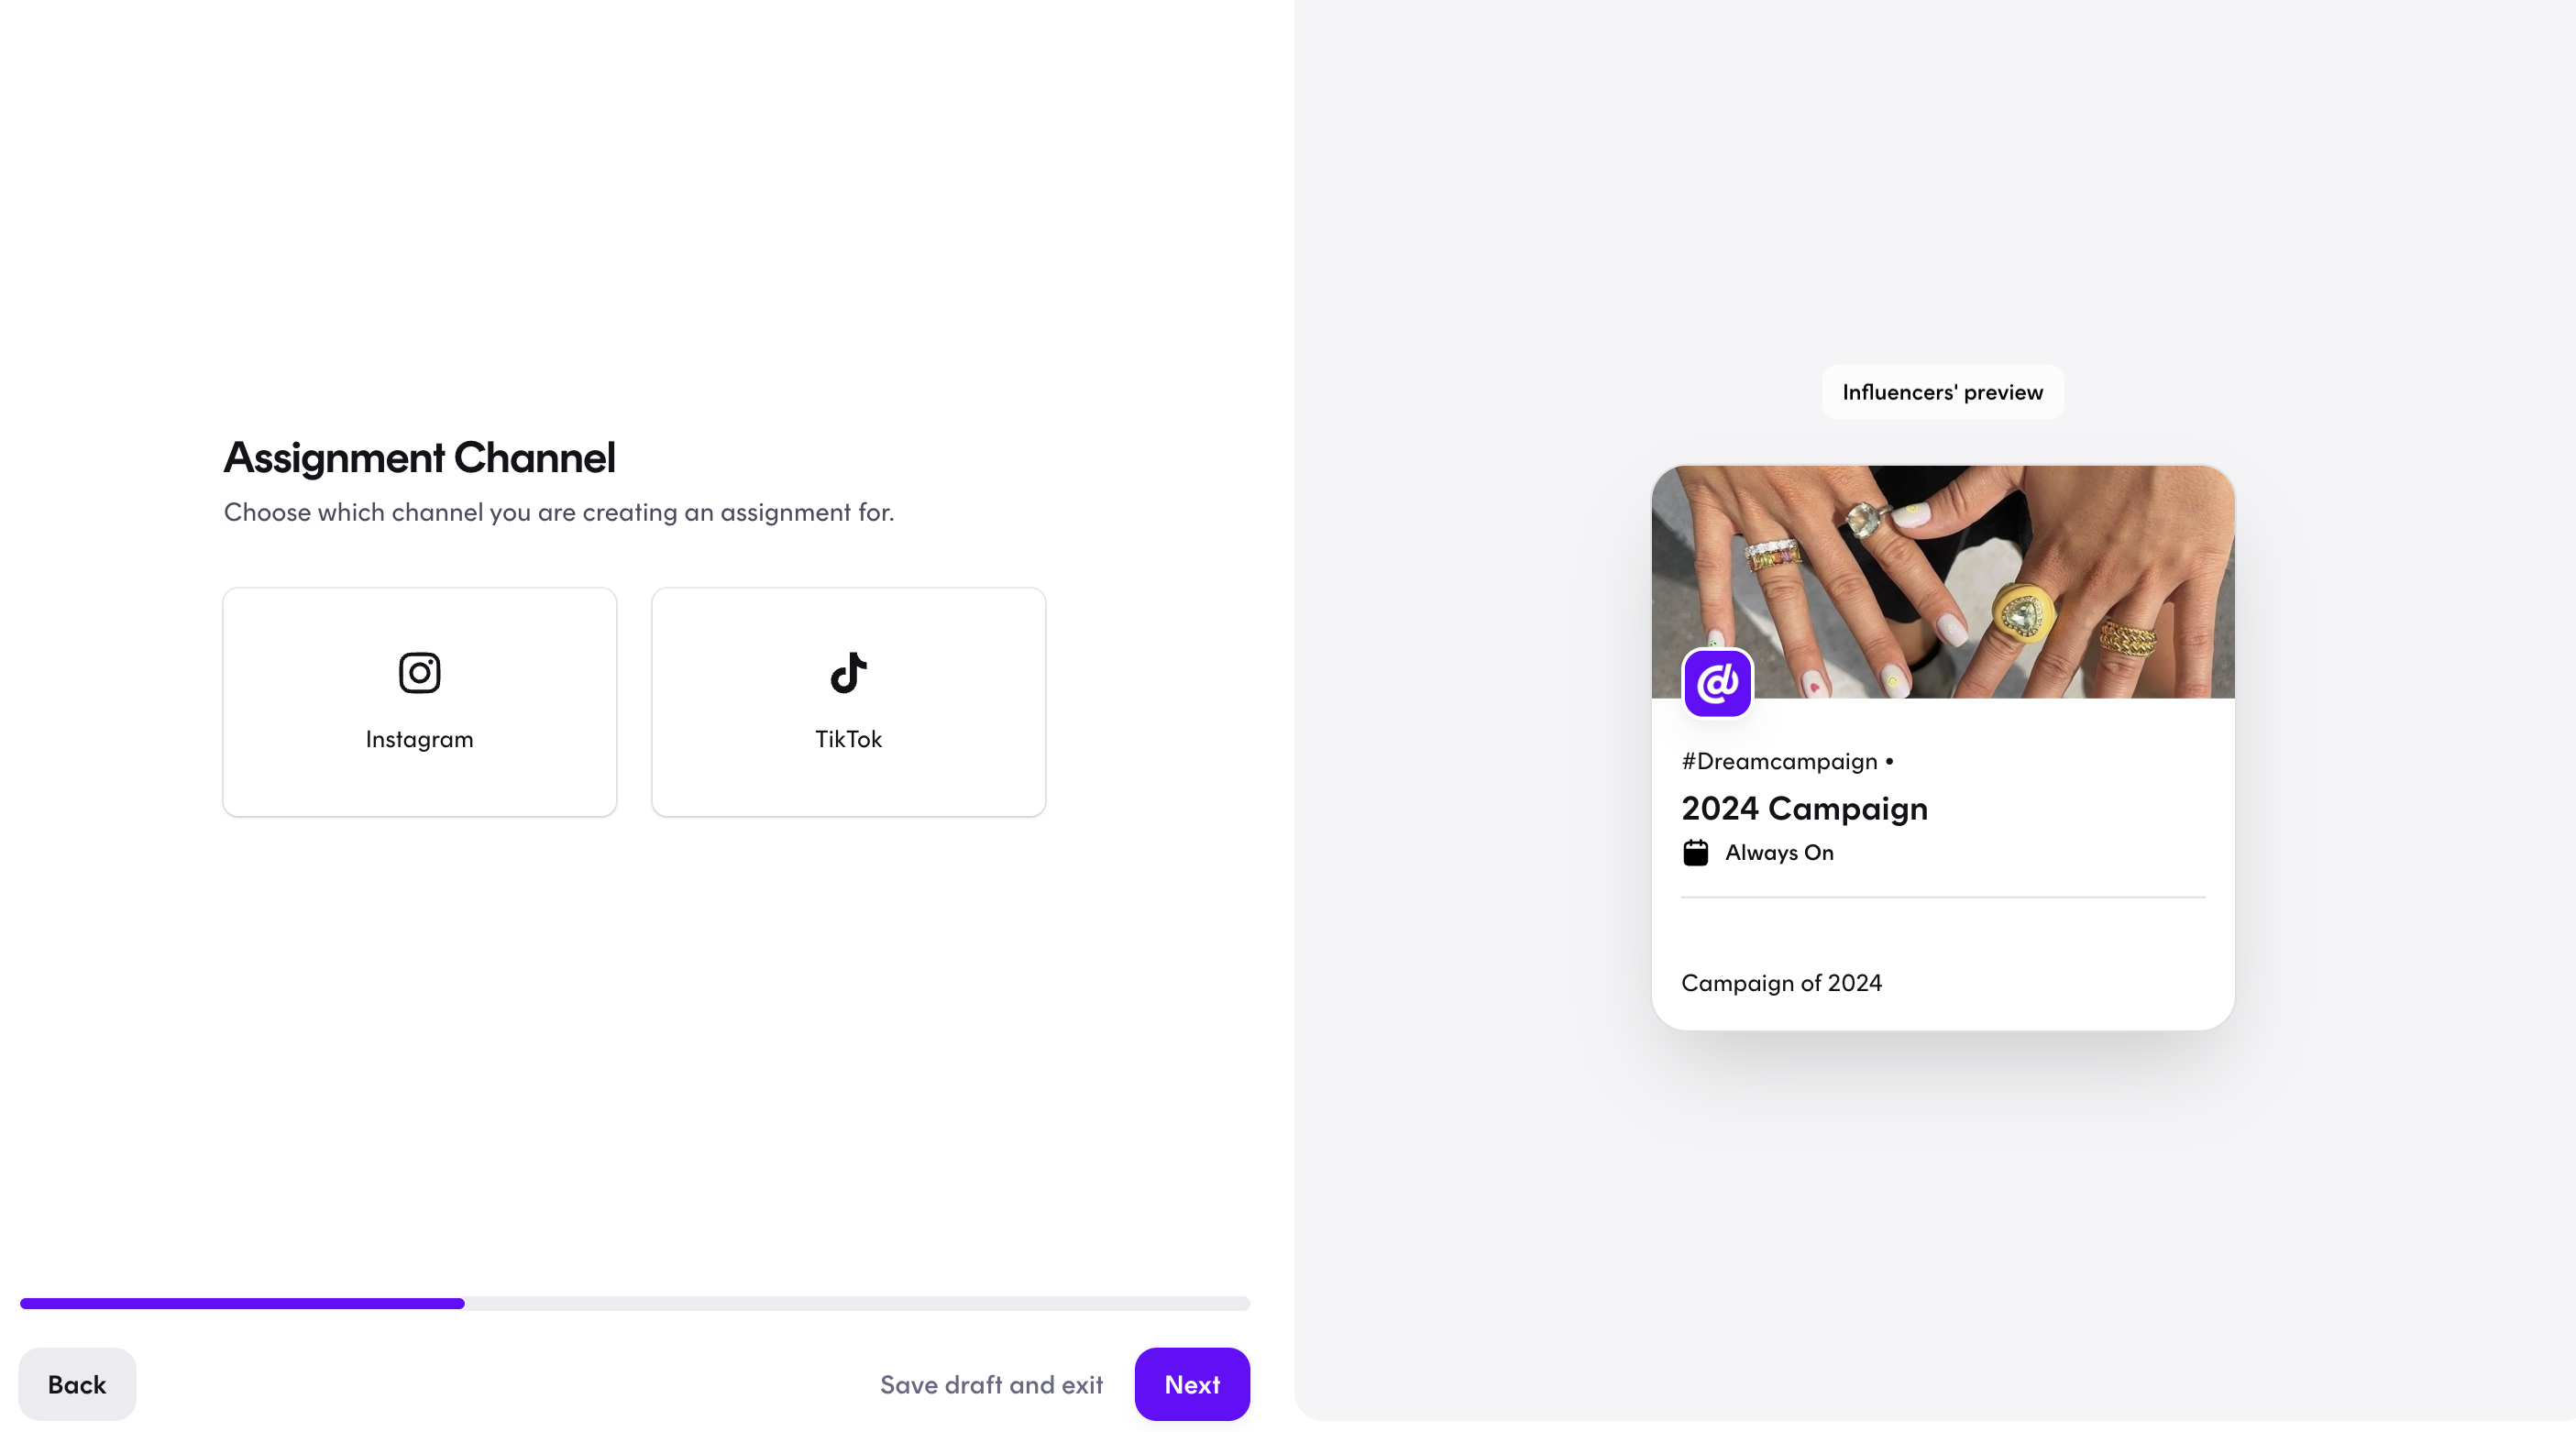
5. Pick a channel:
Now it’s time to choose which channel you want your campaign to be on.
You can choose between Instagram or TikTok.
On a campaign it’s only possible to choose one channel, because of our tracking system.
(If you wish your campaign to be on both Instagram and TikTok, we would recommend you to make a campaign on Instagram, and then duplicate it, and then make changes so it fits for TikTok. In that way you don’t have to write everything twice.)
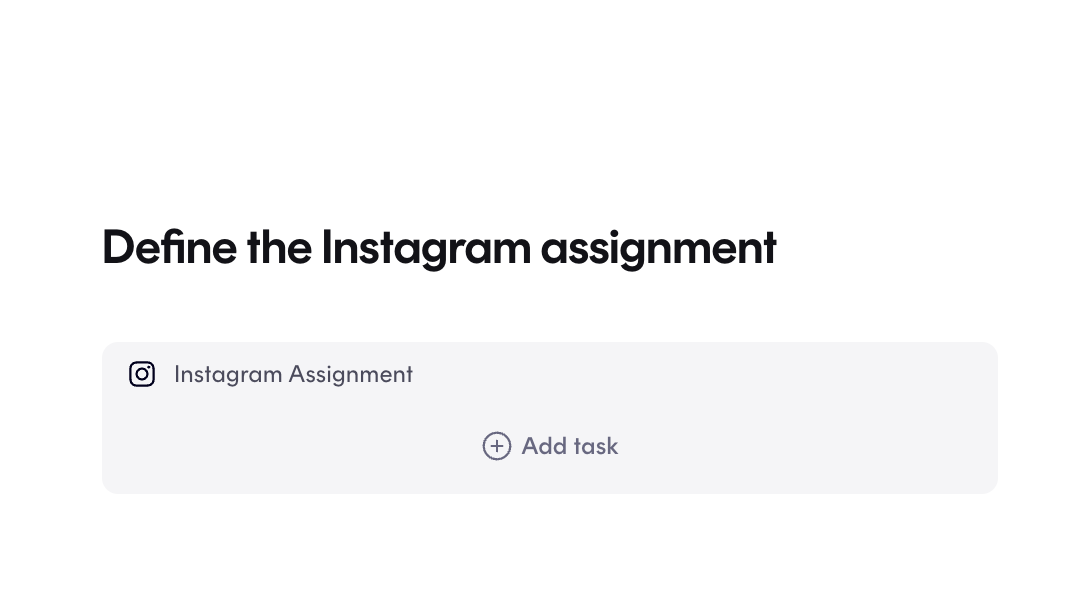
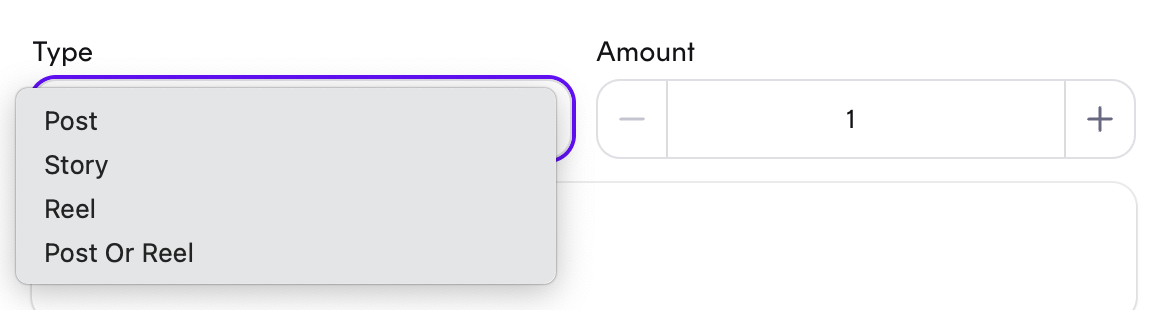
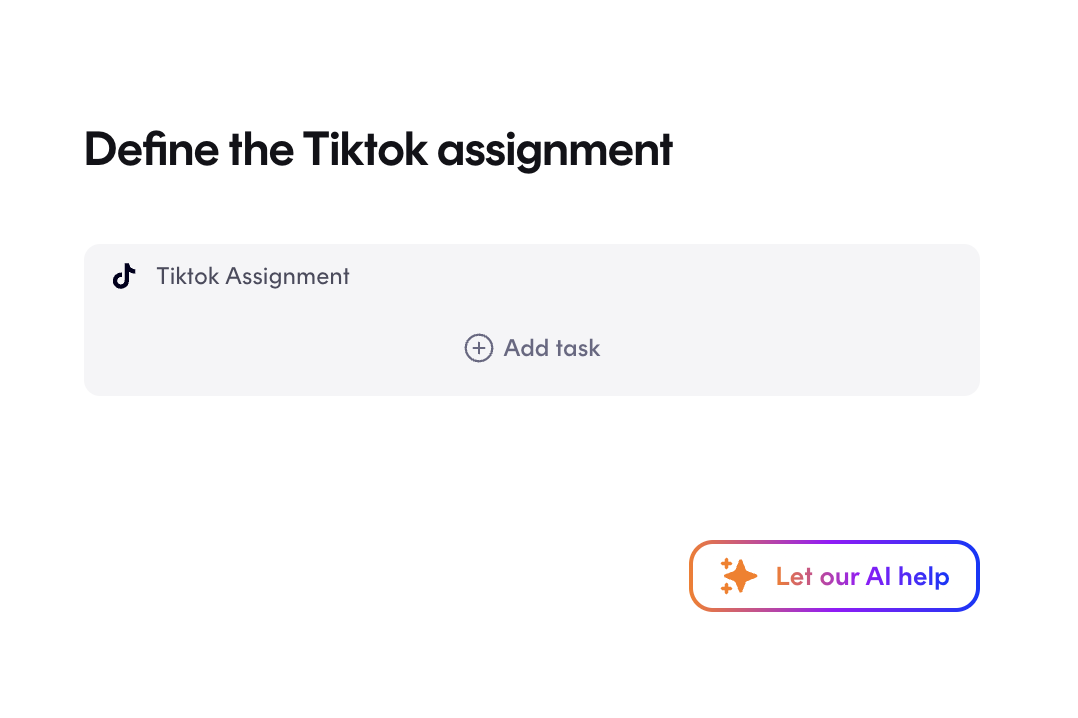
6. The assignment:
This is where you choose how much content you wish to get pr. influencer on this campaign.
Next up is to choose if you want x numbers of Instagram posts, x number of stories and/or x number of Reels. You can choose all three types of content, 2 types of content or just one type of content. On Instagram, it's possible to give the influencers the option to choose what kind of content they want to deliver, which ensures no content getting lost in connection with the campaign (the option: "Post or Reel"). If it’s a TikTok campaign, you can choose x number of TikTok posts. "Posts" will be defined as
Under each type of content, you can write a short brief of what type of content you would like to receive.
It’s always a good idea to set do’s and don'ts, to give the influencers an idea of what you wish them to post, a kind of guideline. In this section, you might also consider to include these specific guidelines (you can pick and choose what you find relevant for your specific campaign):
- If you want the influencers to include a link in their posts or stories, it can be a good idea to remind the influencers about this: "Please remember to include the link" (you can enable this, on the next step of the campaign setup)
- If you want the influencers to include a discount code in their posts or stories, it can be a good idea to remind the influencers about this: "Please remember to include your unique code" (you can enable this, on the next step of the campaign setup)
- If one of the assignments is a story, you can include: "A repost of your reel and/or post in your story, doesn't count as one story-post. It needs to be unique content pieces"
- If one of the assignments is a post: "If you create a carousel, please only include relevant pictures and/or videoes related to the campaign. So no content-dump in the middle of a 'week that went by'-post"
- If you have previous experience with influencer campaigns, it's a great idea to share creative ideas with the team that they can "pick and choose" from
- If you need raw material (without text, music etc.) please include this as a demand
- If you need pre-approval, include this as a FYI: "On this campaign you'll have to get your content approved before posting"
A concrete assignment brief can look something like this:
Encourage your followers to explore our collection, emphasizing that if they love fashion, Dreaminfluence is the ultimate destination. How you present this is totally up to you - just ensure your message is personal, engaging, and authentic to resonate with your audience. Concrete ideas to tap into this message could be:
💡 Outfit of the Day
💡 How to style 1 piece in 3 ways
💡 Unboxing/try out haul
However you want to resolve the assignment, please make sure you stay within these guidelines:
✅Make a carousel of pictures/videos of you where the spotlight is on the item, and how you styled it your way.
✅ Be creative and think about how to best present the texture, pattern, and overall look of the piece.
✅ Highlight the versatility and chicness of the piece in your everyday wardrobe
✅ Remember to tag @dreaminfluence.app and use our campaign hashtag
✅ We would like for you to be outside on the pictures and/or videoes
❌ No competing brands on picture or in caption
❌ We do not accept mirror selfies as a valid image

7. Assignment requirements:
Here you are able to insert the link or discount code you want your influencers to use when posting their content

8. Join message:
Write what you want your influencers to receive in their inbox when they join your campaign. This is an automated message, and it can be a good idea to include some of the following:
- Generally it's a good place to include the influencers in "next steps"
- If you, as a brand, ship out products manually, it would be to include when you expect to ship the products and when the influencers should expect the delivery
- Highlight very important things, such as: raw material, pre-approval processes etc.
- It can also be a good idea to remind the influencers to update their address information and to double check the assignment before posting
- If you are a restaurant where influencers should book a table or something similar, please include how this process works

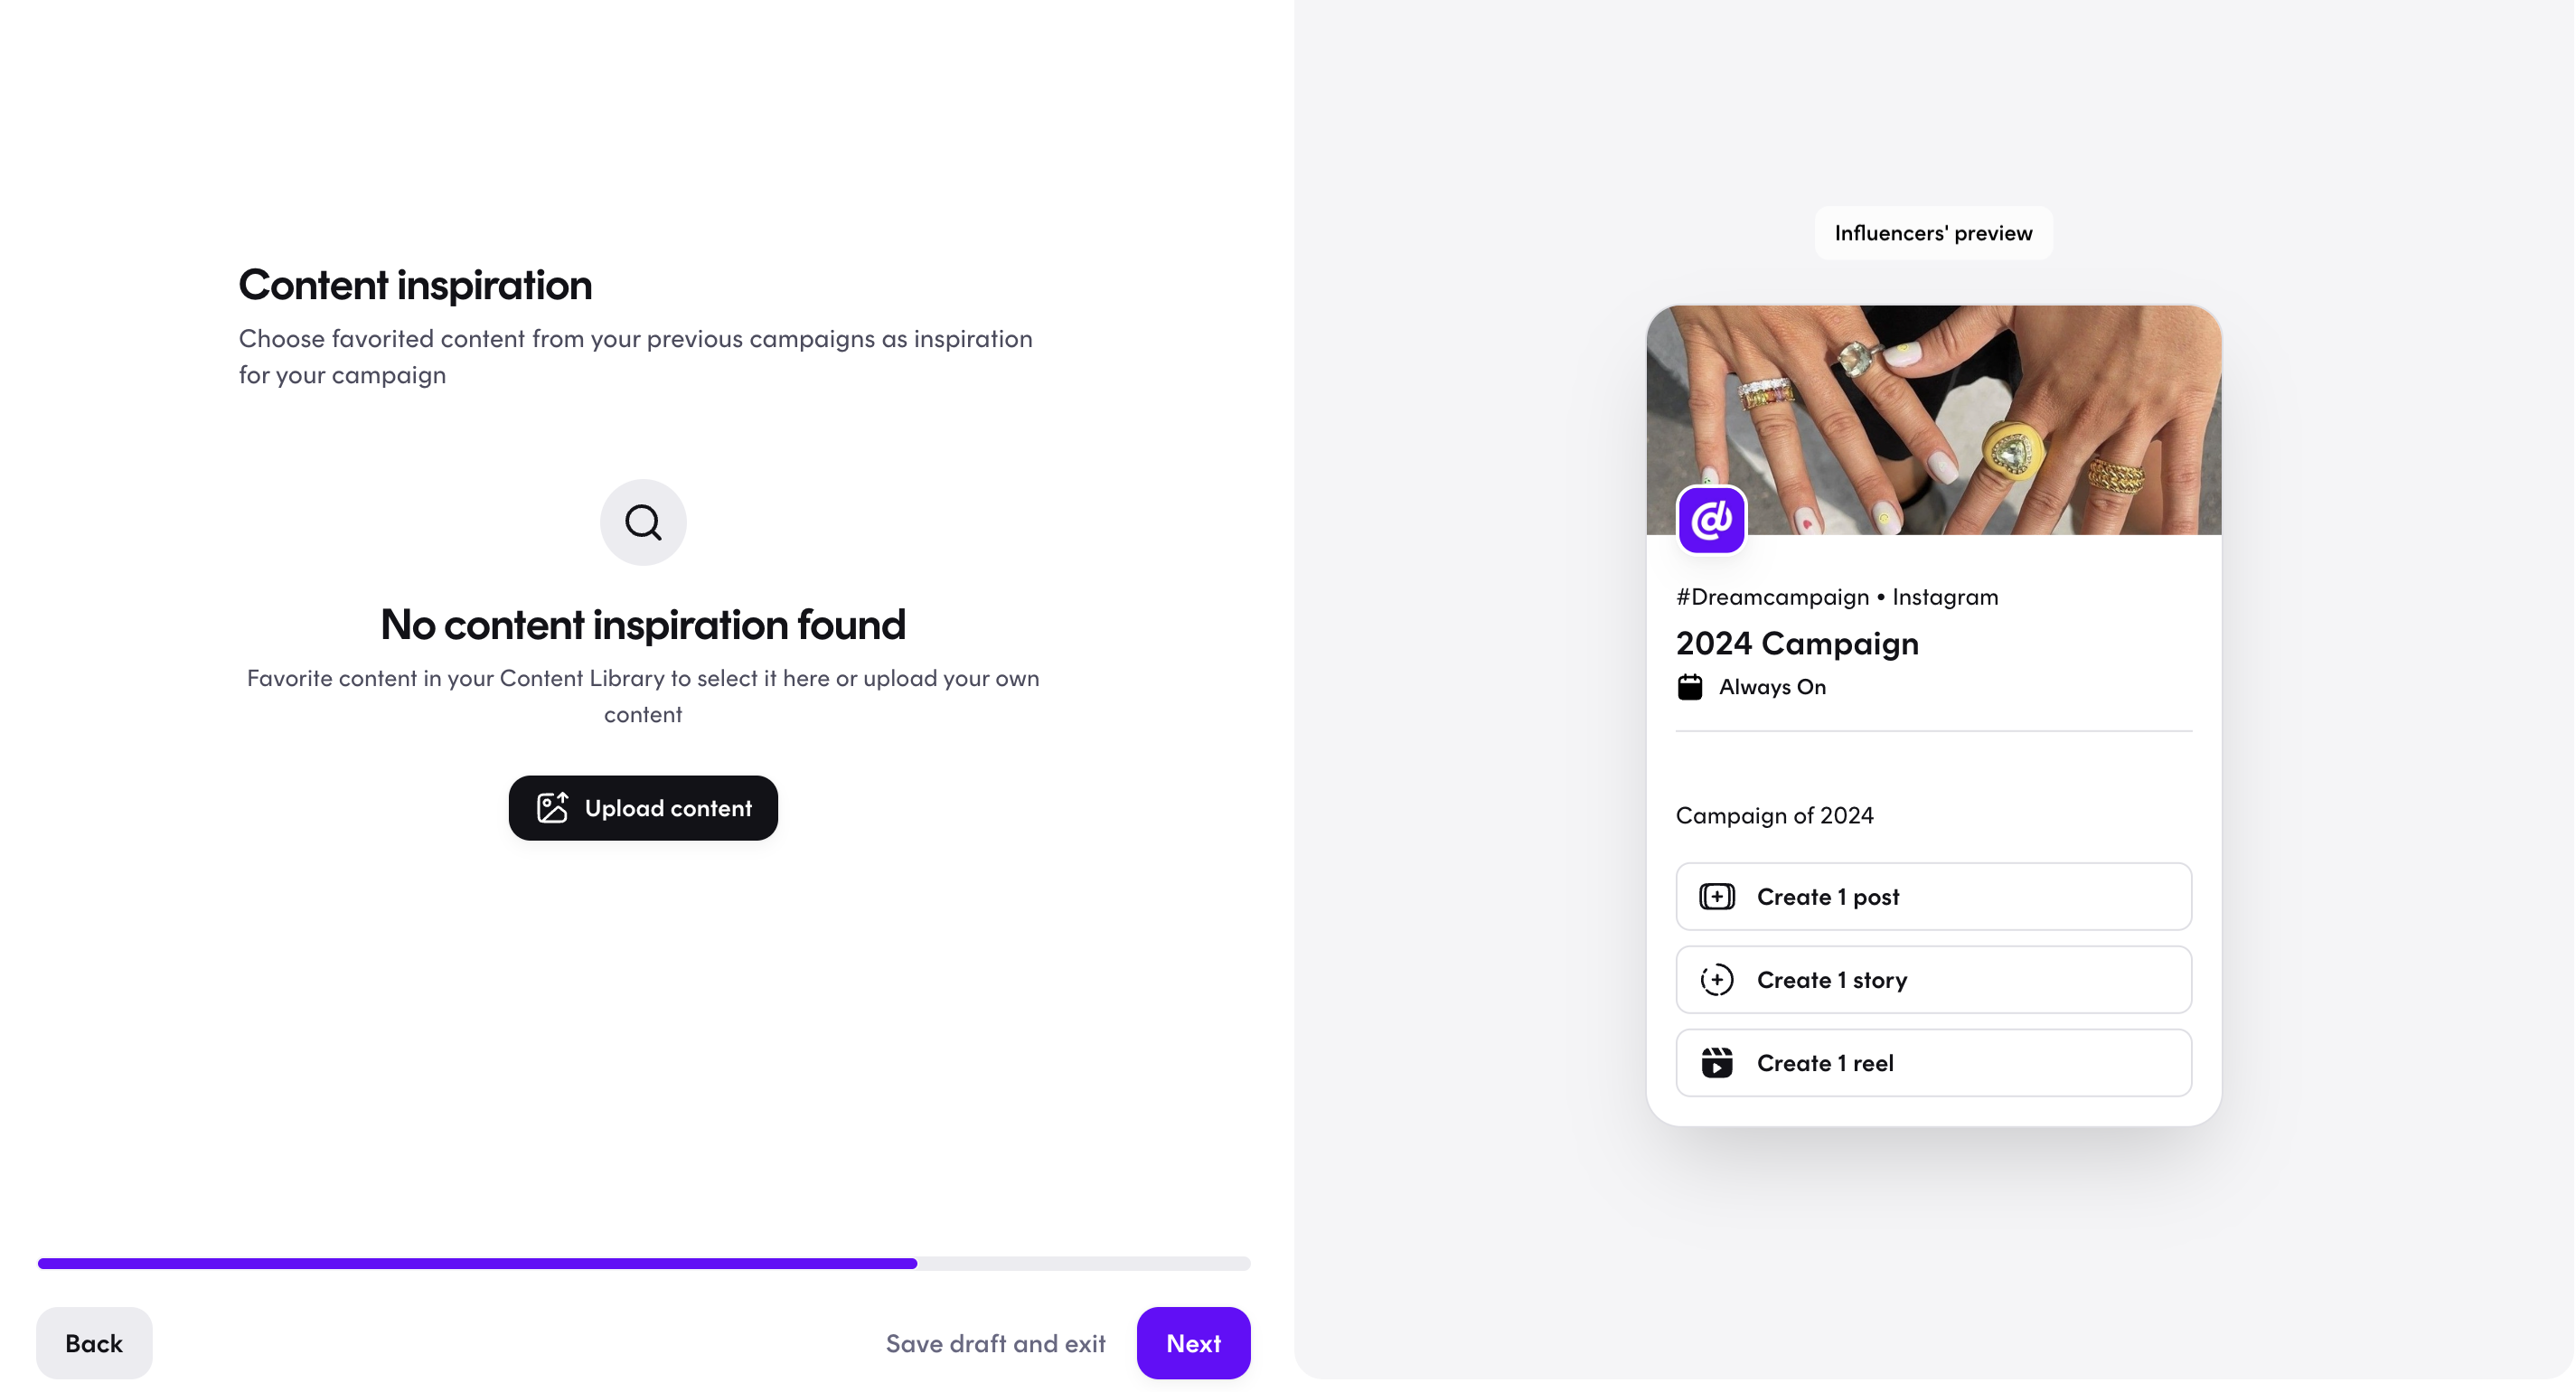
9. Content inspiration:
When you have received the first content on your campaign, it is possible for you to highlight the content that you like, in your content library. When you click on the "<3" it will be possible to add it on a campaign, under “content inspiration”
This is also a guide for the influencers, so they know what type of content you would like to see and receive.
You are also able to upload your own saved content
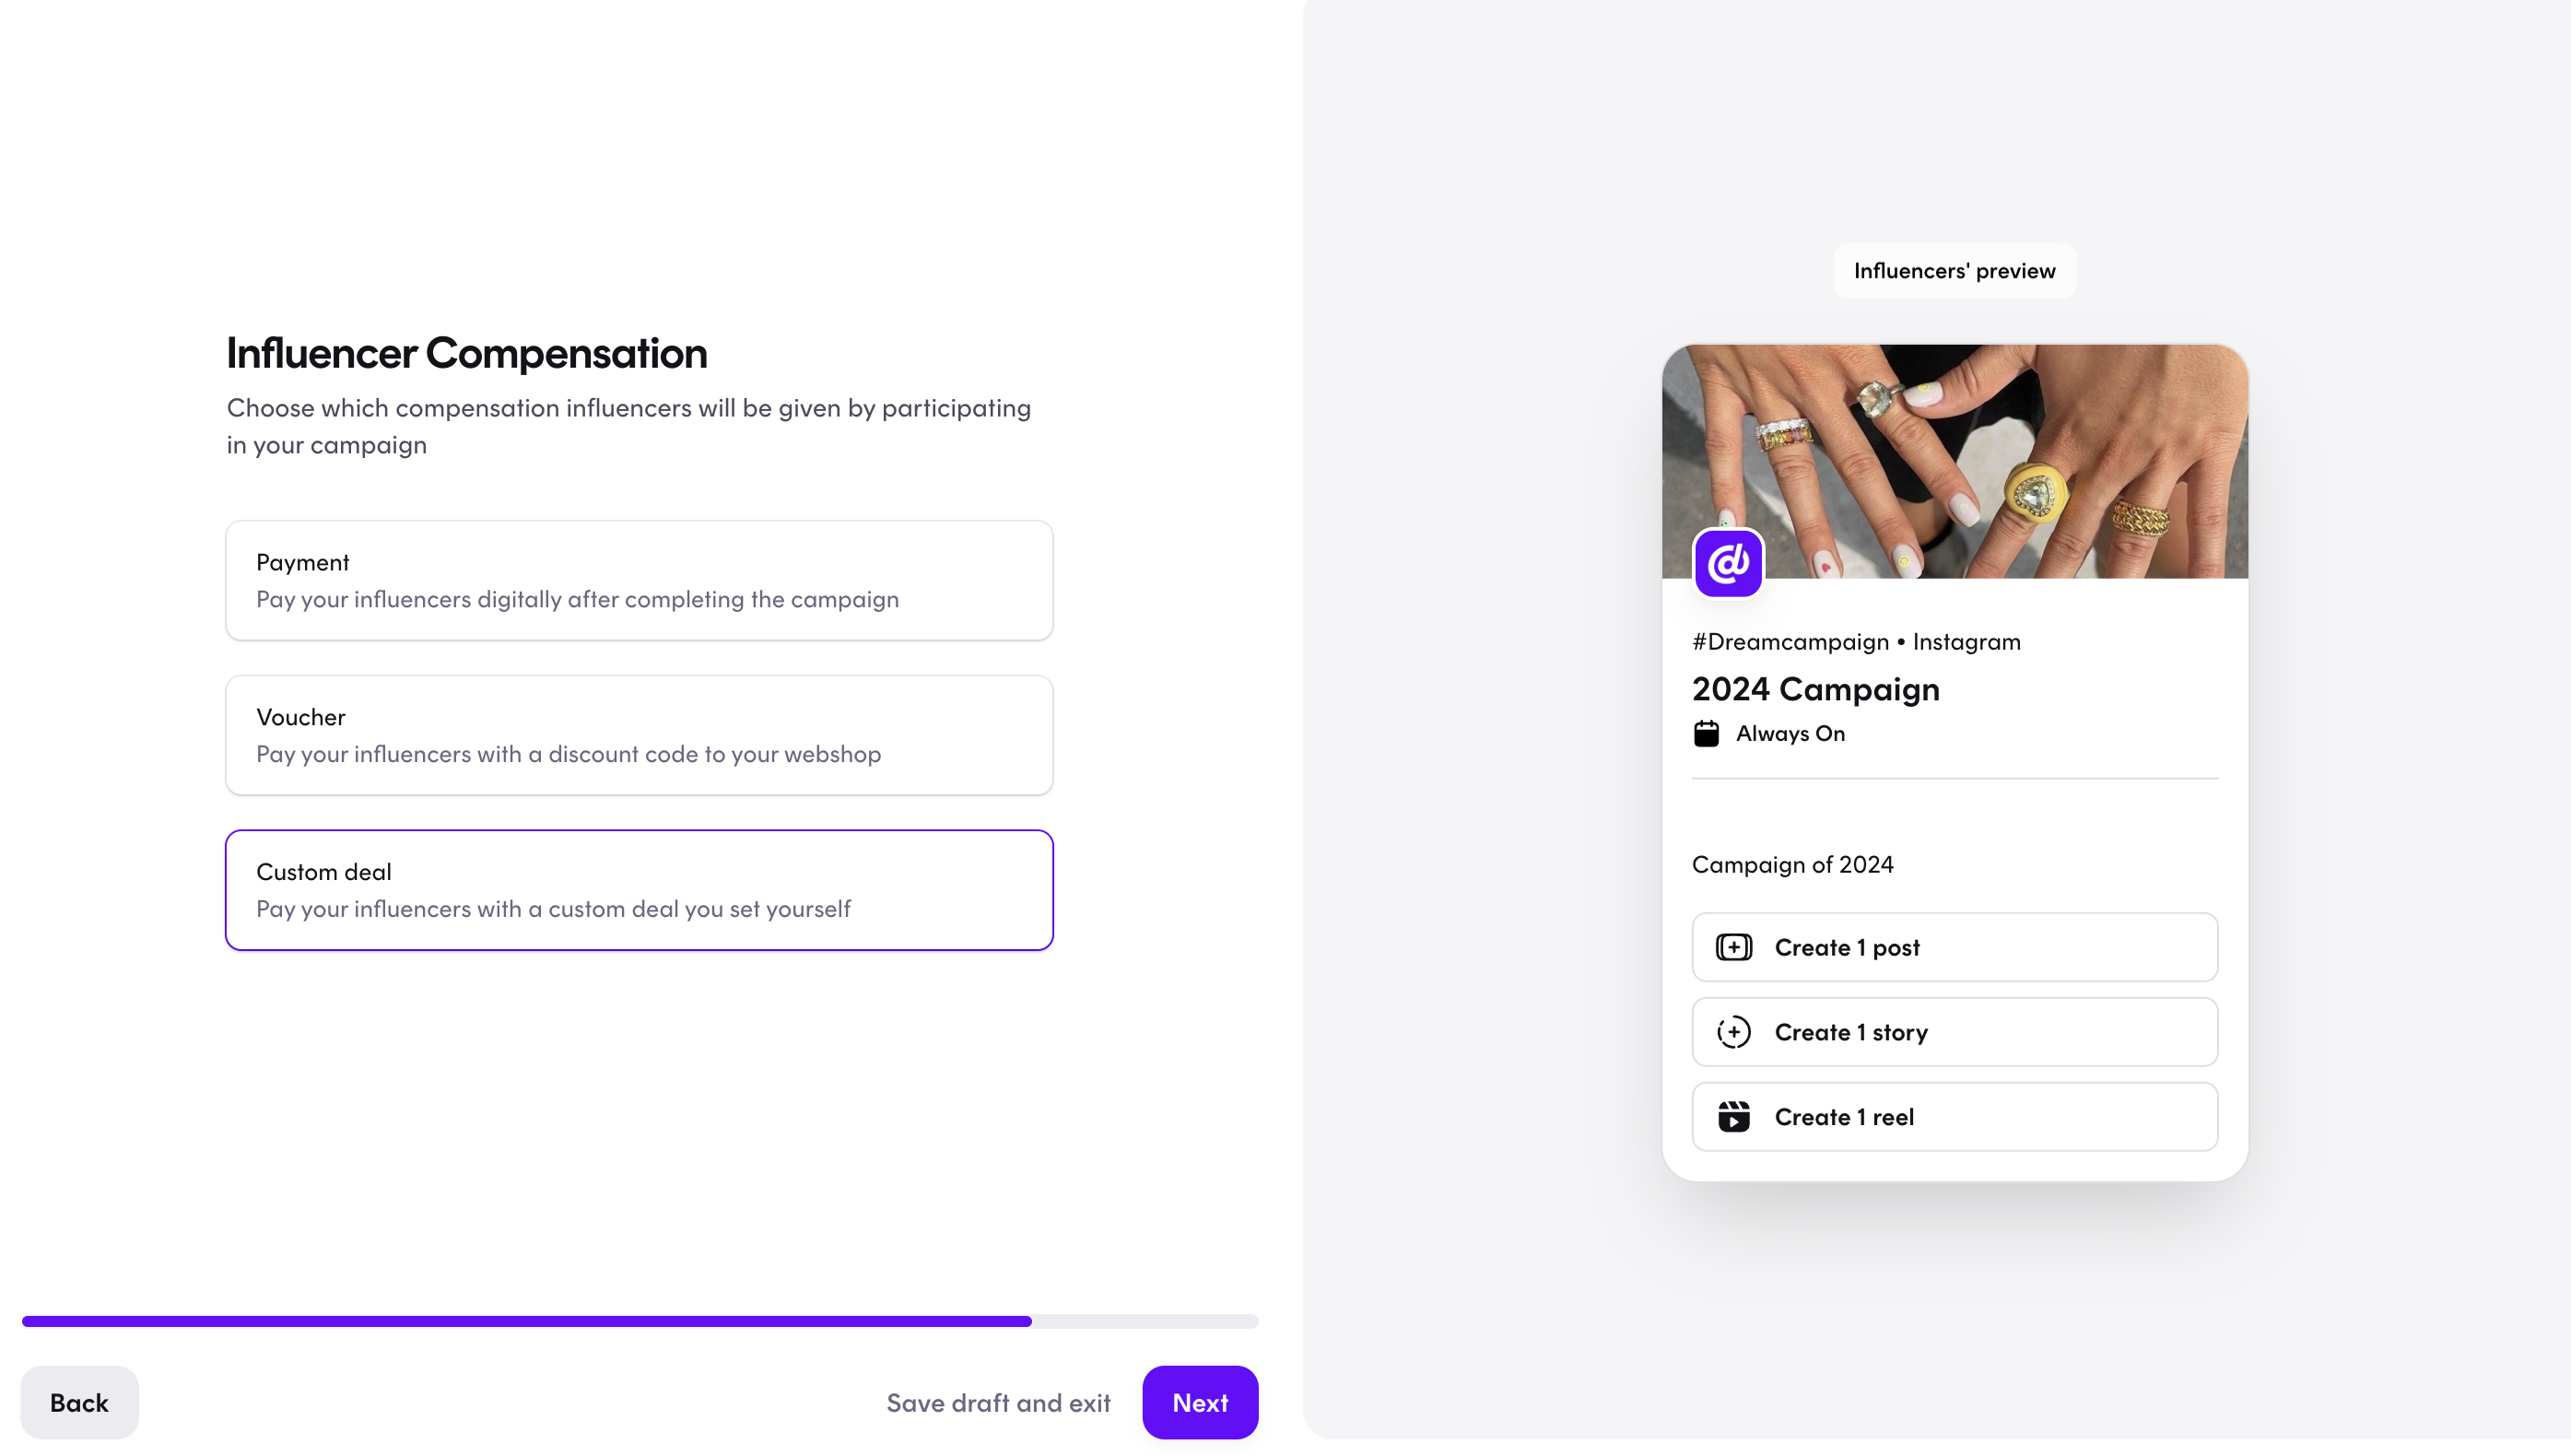
9. Influencer Compensation:
How do you want to pay your influencers on this campaign? There are 3 options:
Payment
If you want to pay the influencers with money, you can set the amount ex. 500 DKK, and then everyone who participates the campaign and post content, will recessive the amount you selected. When the campaign is done, you will receive an invoice from us, and when you have paid the invoice the influencers will get their money.
Voucher
If you have made an integration between your shop and our platform (only available for shops with Woocommerce or Shopify), then you can automatically give the influencers a giftcard to your shop, so you don't have to manually send packages to them.
Custom reward:
If you want to send the influencer product, but don’t have the integration with our platform (Woocommerce / Shopify). It can also be, if you want to send the influencers products that are not live on your webshop yet, new arrivals or if you will give them tickets to your amusement park etc.
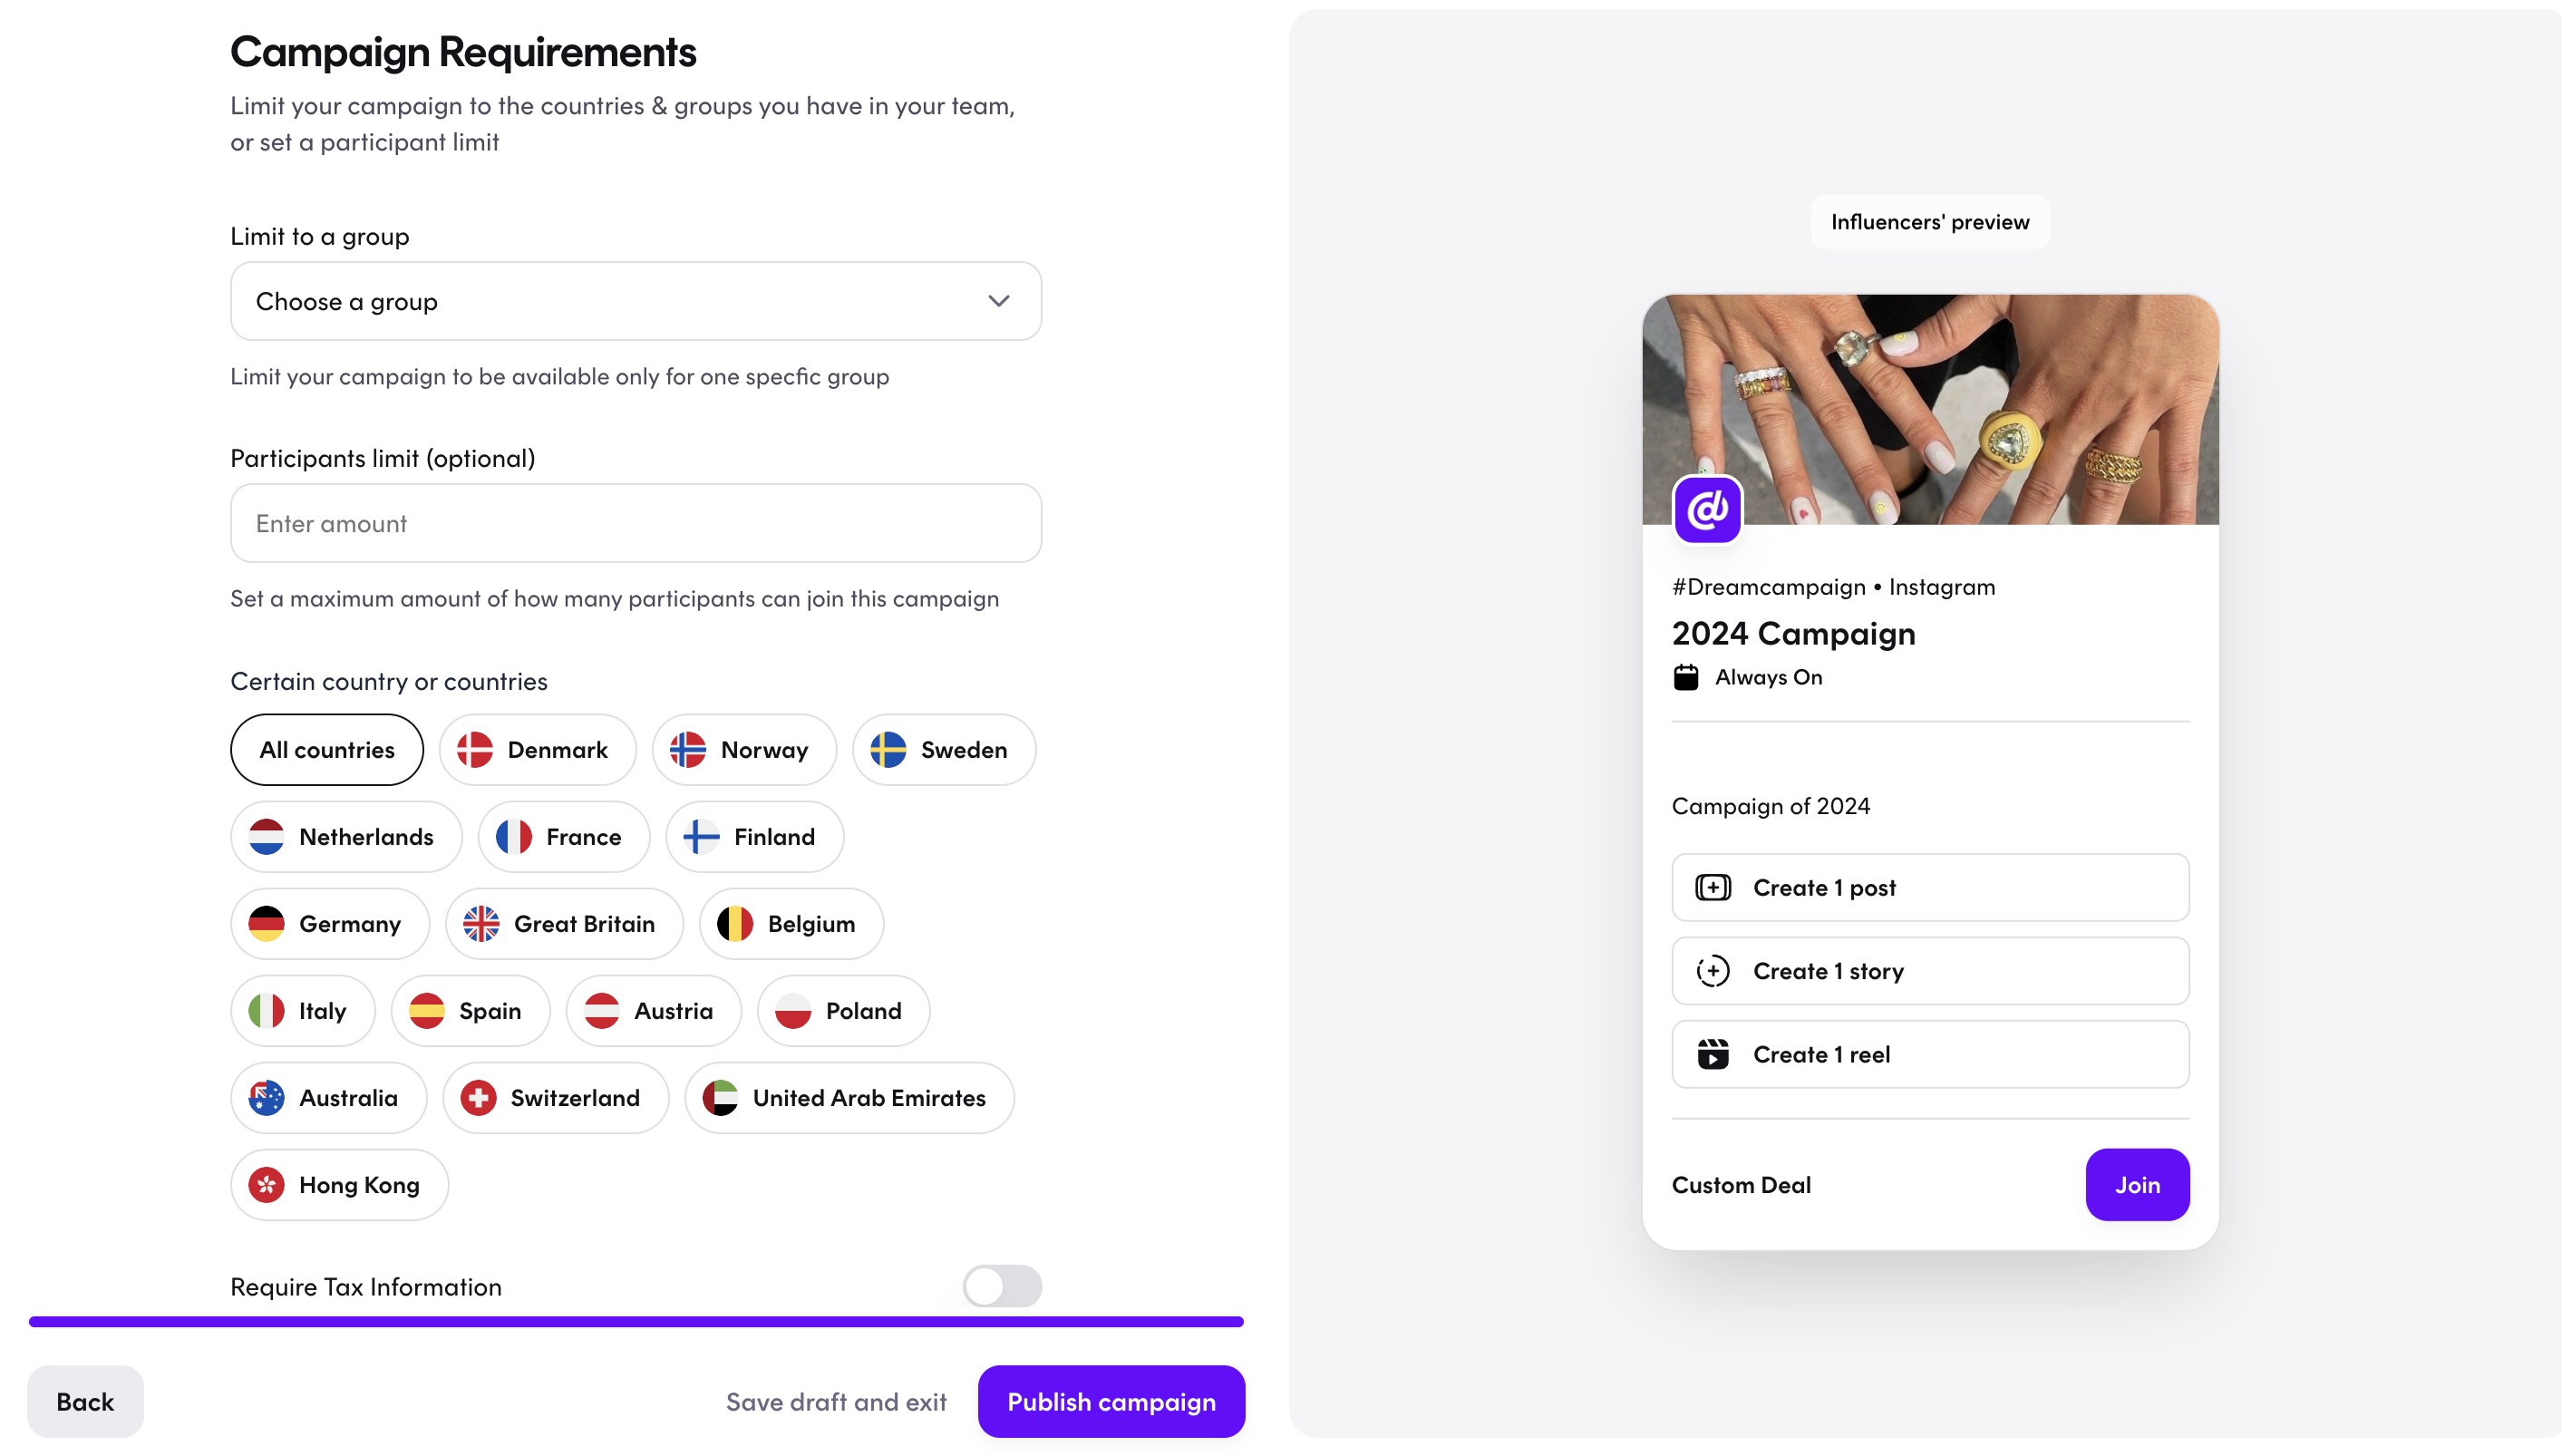
10. Campaign Requirements:
Here you can choose which countries you want to make the campaign available for, as well as if you want to limit to a generated group
It is only possible to make a campaign live, in the countries your team is available at.
(If you have made specific groups, you can also choose to only make the campaign available for a specific group.)
11. Finish
If your done editing your campaign, click on “Publish Campaign” and then the campaign will be available for your selected group, country or all to see and take part in the campaign 👏